

How I made my NFC Business Card
• 0 views
My business card wirelessly sends my website link to phones and lights up an LED, all the while powered by electricity in the air. Here's how I did it.
I wanted to make something memorable, that would also double as an easy way to transmit my personal info to anyone I meet. I wanted to use Near Field Communication (NFC) technology on a Printed Circuit Board (PCB).
Some Background
NFC is a communication protocol that is gaining in adoption. Now, all Android phones and iPhones 10 and up support background NFC signal reading. This means you can simply tap your phone to a NFC transmitter and your phone will pick up, a URL, email, message, or any other short message that was programmed in. NFC beats out QR codes in that it doesn't need to be printed, and its content can be changed whenever you want.
Probably the most important component is the Integrated Circuit (IC) that does all of the magic of transmitting the signal, harvesting power, and powering the LED. To this end, I chose the NT3H1101W0FHKH (say that 3 times really fast).
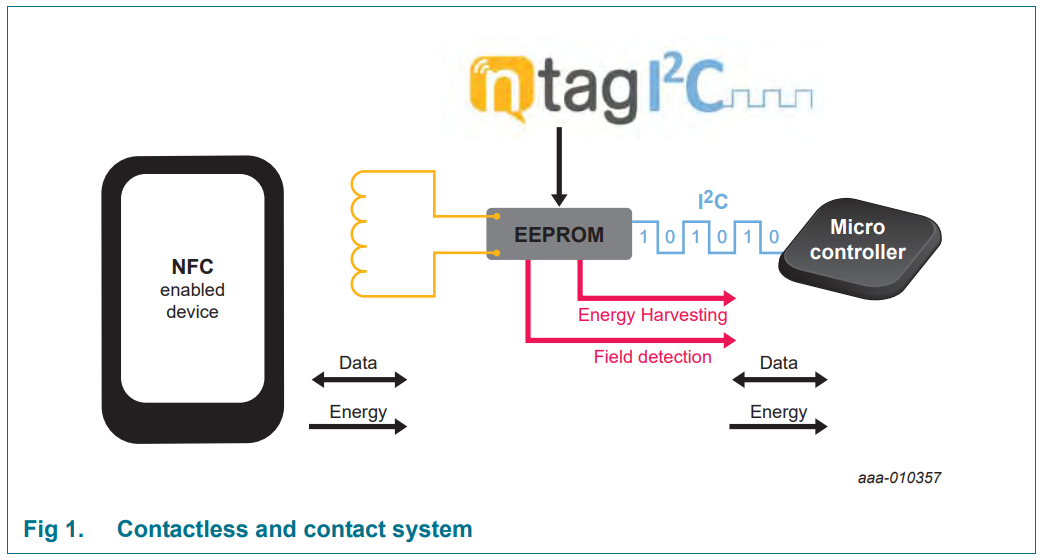
The chip actually comes with I2C communication as well to interop with a microcontroller. I didn't want to add that in as that would require a coin battery to power, and I didn't want this card to need any battery or wire. The power harvester component pulls faint electricity from the radio waves sent by a phone when it taps the antenna. It's just enought power to light up a small LED.
The Circuit
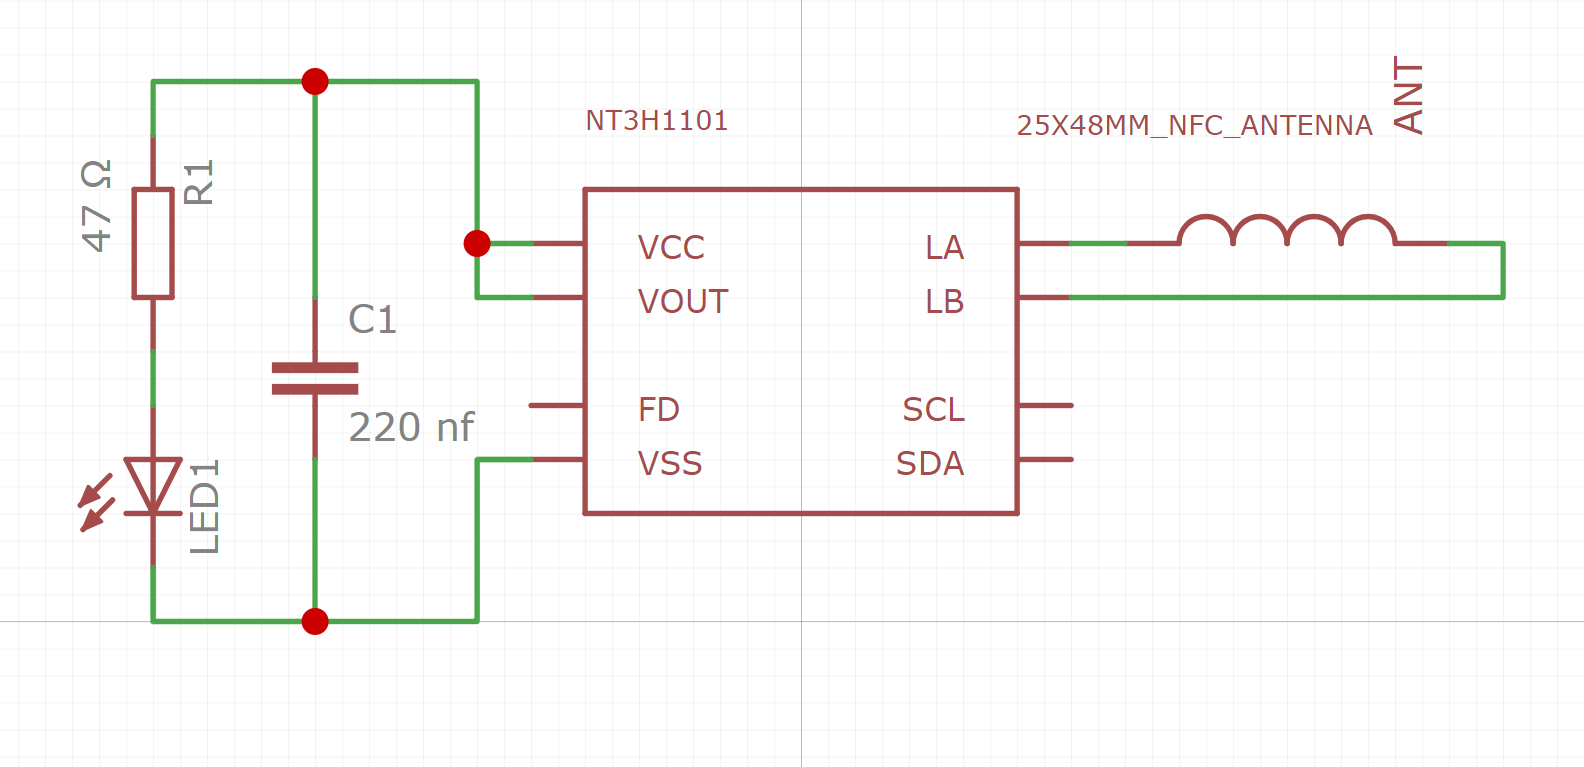
There's not many components needed for this IC, just a coupling capacitor and a current limiting resistor for the LED. I calculated that the power draw should be around 20-40mW so I got the lowest power white 0806 sized LED I could find, and sized the resistor at 47 Ohms. The IC datasheet calls for a capacitor between 150-220 nano Farads. I just went with 200 to play it safe.
There are many ways one can approach the antenna. You can run the calculations, get the exact impedance needed and design one with the exact tract sizes and length needed. I chose to use an antenna design from an open source component library from the manufacturer of the IC. Every field of Engineering follows the same principles of standing on the shoulders of giants. I know how to design an antenna, but using a tried and tested one is optimal. Likewise, I know how to make an HTTP request, but it's much better, and safer, to use a high quality application like cURL.
With the bill of materials chosen, I put the pieces together in a schematic.
PCB Design
Now for the fun part. For Electronic Design Automation (EDA), which is like an IDE for electronics, I went with EasyEDA. I had used some more professional tools in college, but my advice in any field is use the tool that helps you finish the job that fastest. EasyEDA is a very simple straightforward tool for the kind of board I was making, and more importantly it integrates very well with it's parent company, JLCPCB the manufacturer I used to actually create and assemble the cards.
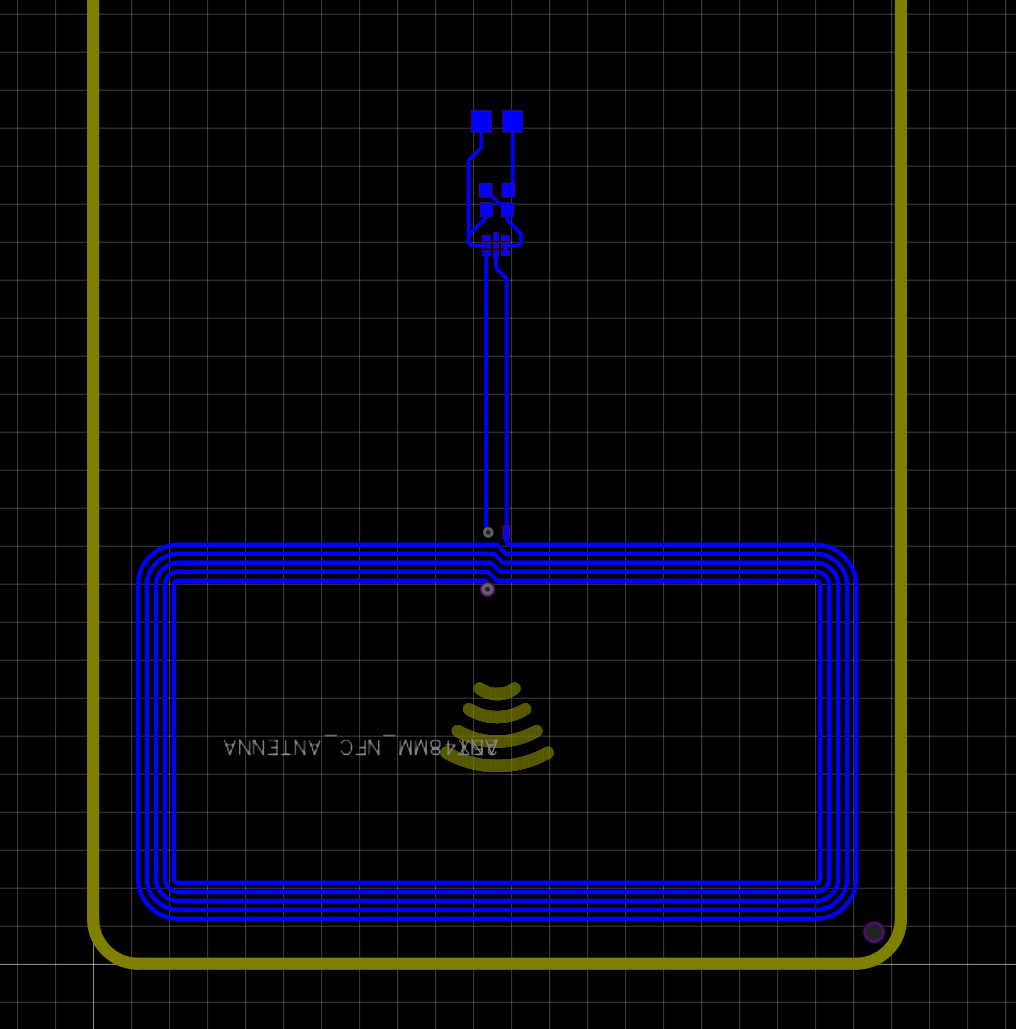
I simply had to create the outline of the card, and place the components into place. Notably, you need a ground plane for the data transmission to work, but it can only cover one half of the card, otherwise it would block the signals coming out of the antenna.
Manufacturing
I decided to not only get the PCB manufactured, but also assembled. This means the factory would also solder the components on the card. My dad, who used to manufacture PCBs, told my I would spend hours on hours trying to solder the tiny components fractions of a millimeter apart. I relented and as it turns out, JLCPCB actually provides assembling at a great price for the low volume I was making. It took a couple weeks to make and ship from China, but once they came I was blown away!
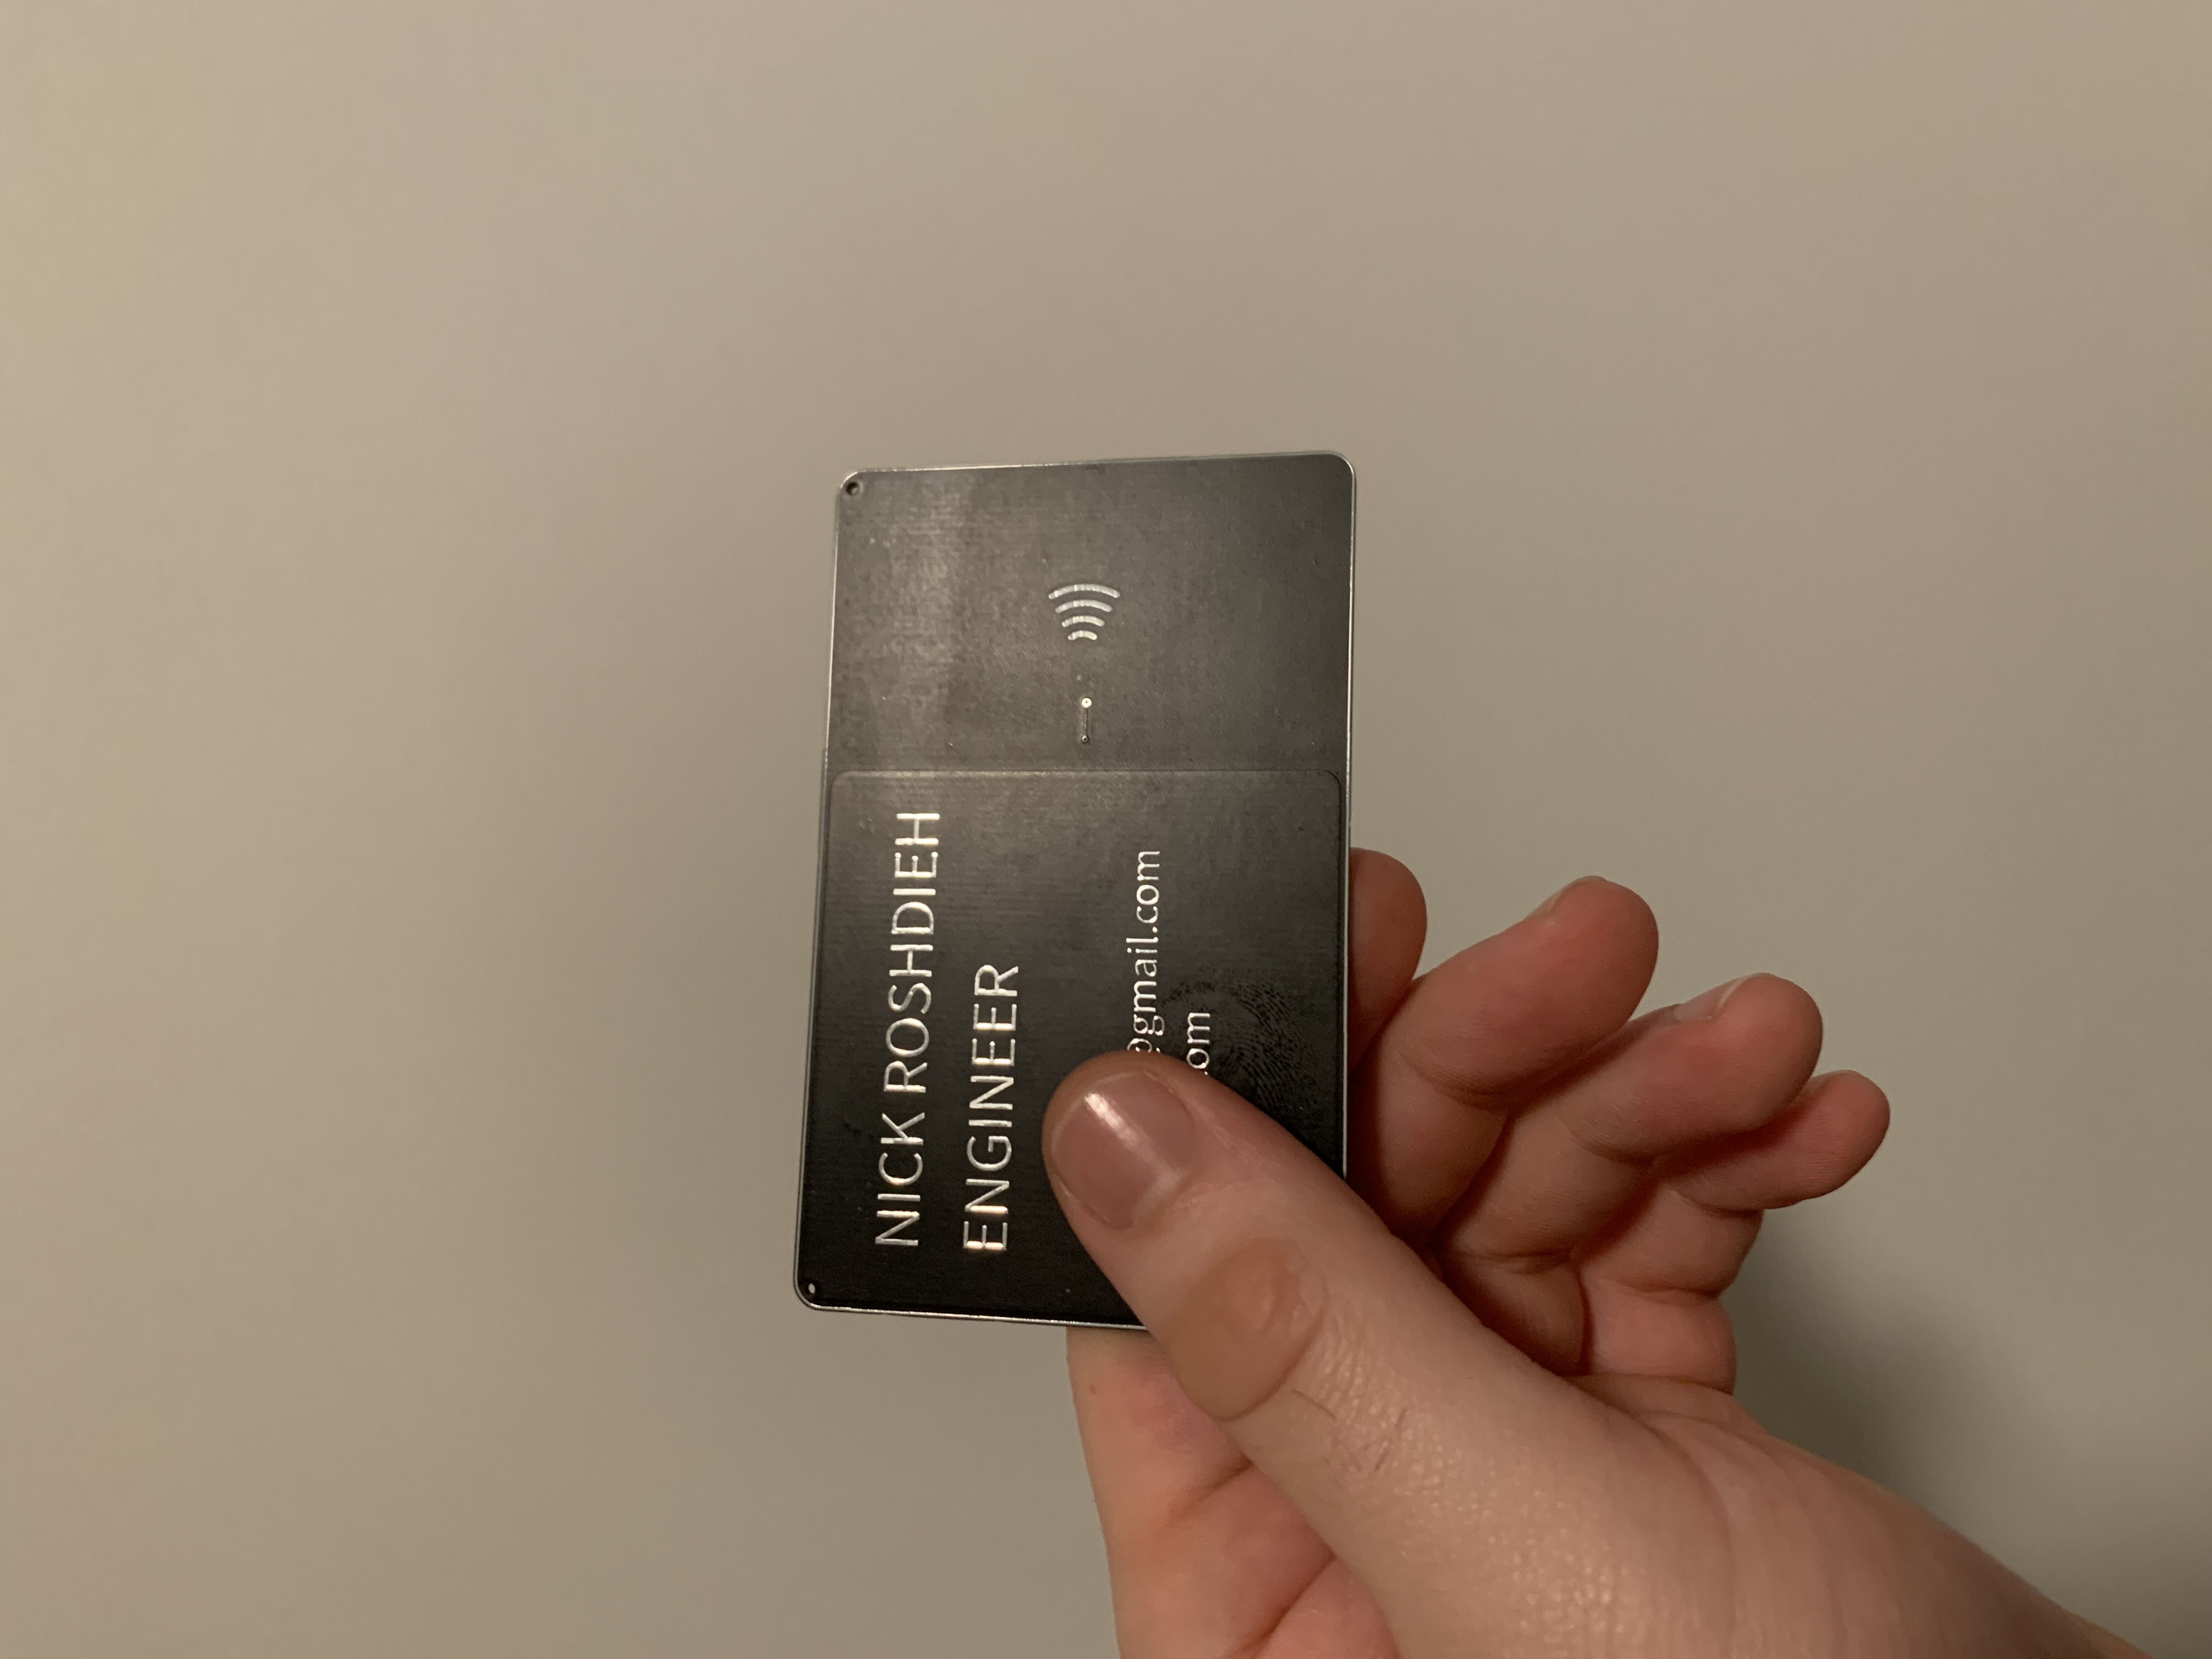
The front, which has my name is actually etched into the metal ground plane, so it is a shiny silver color
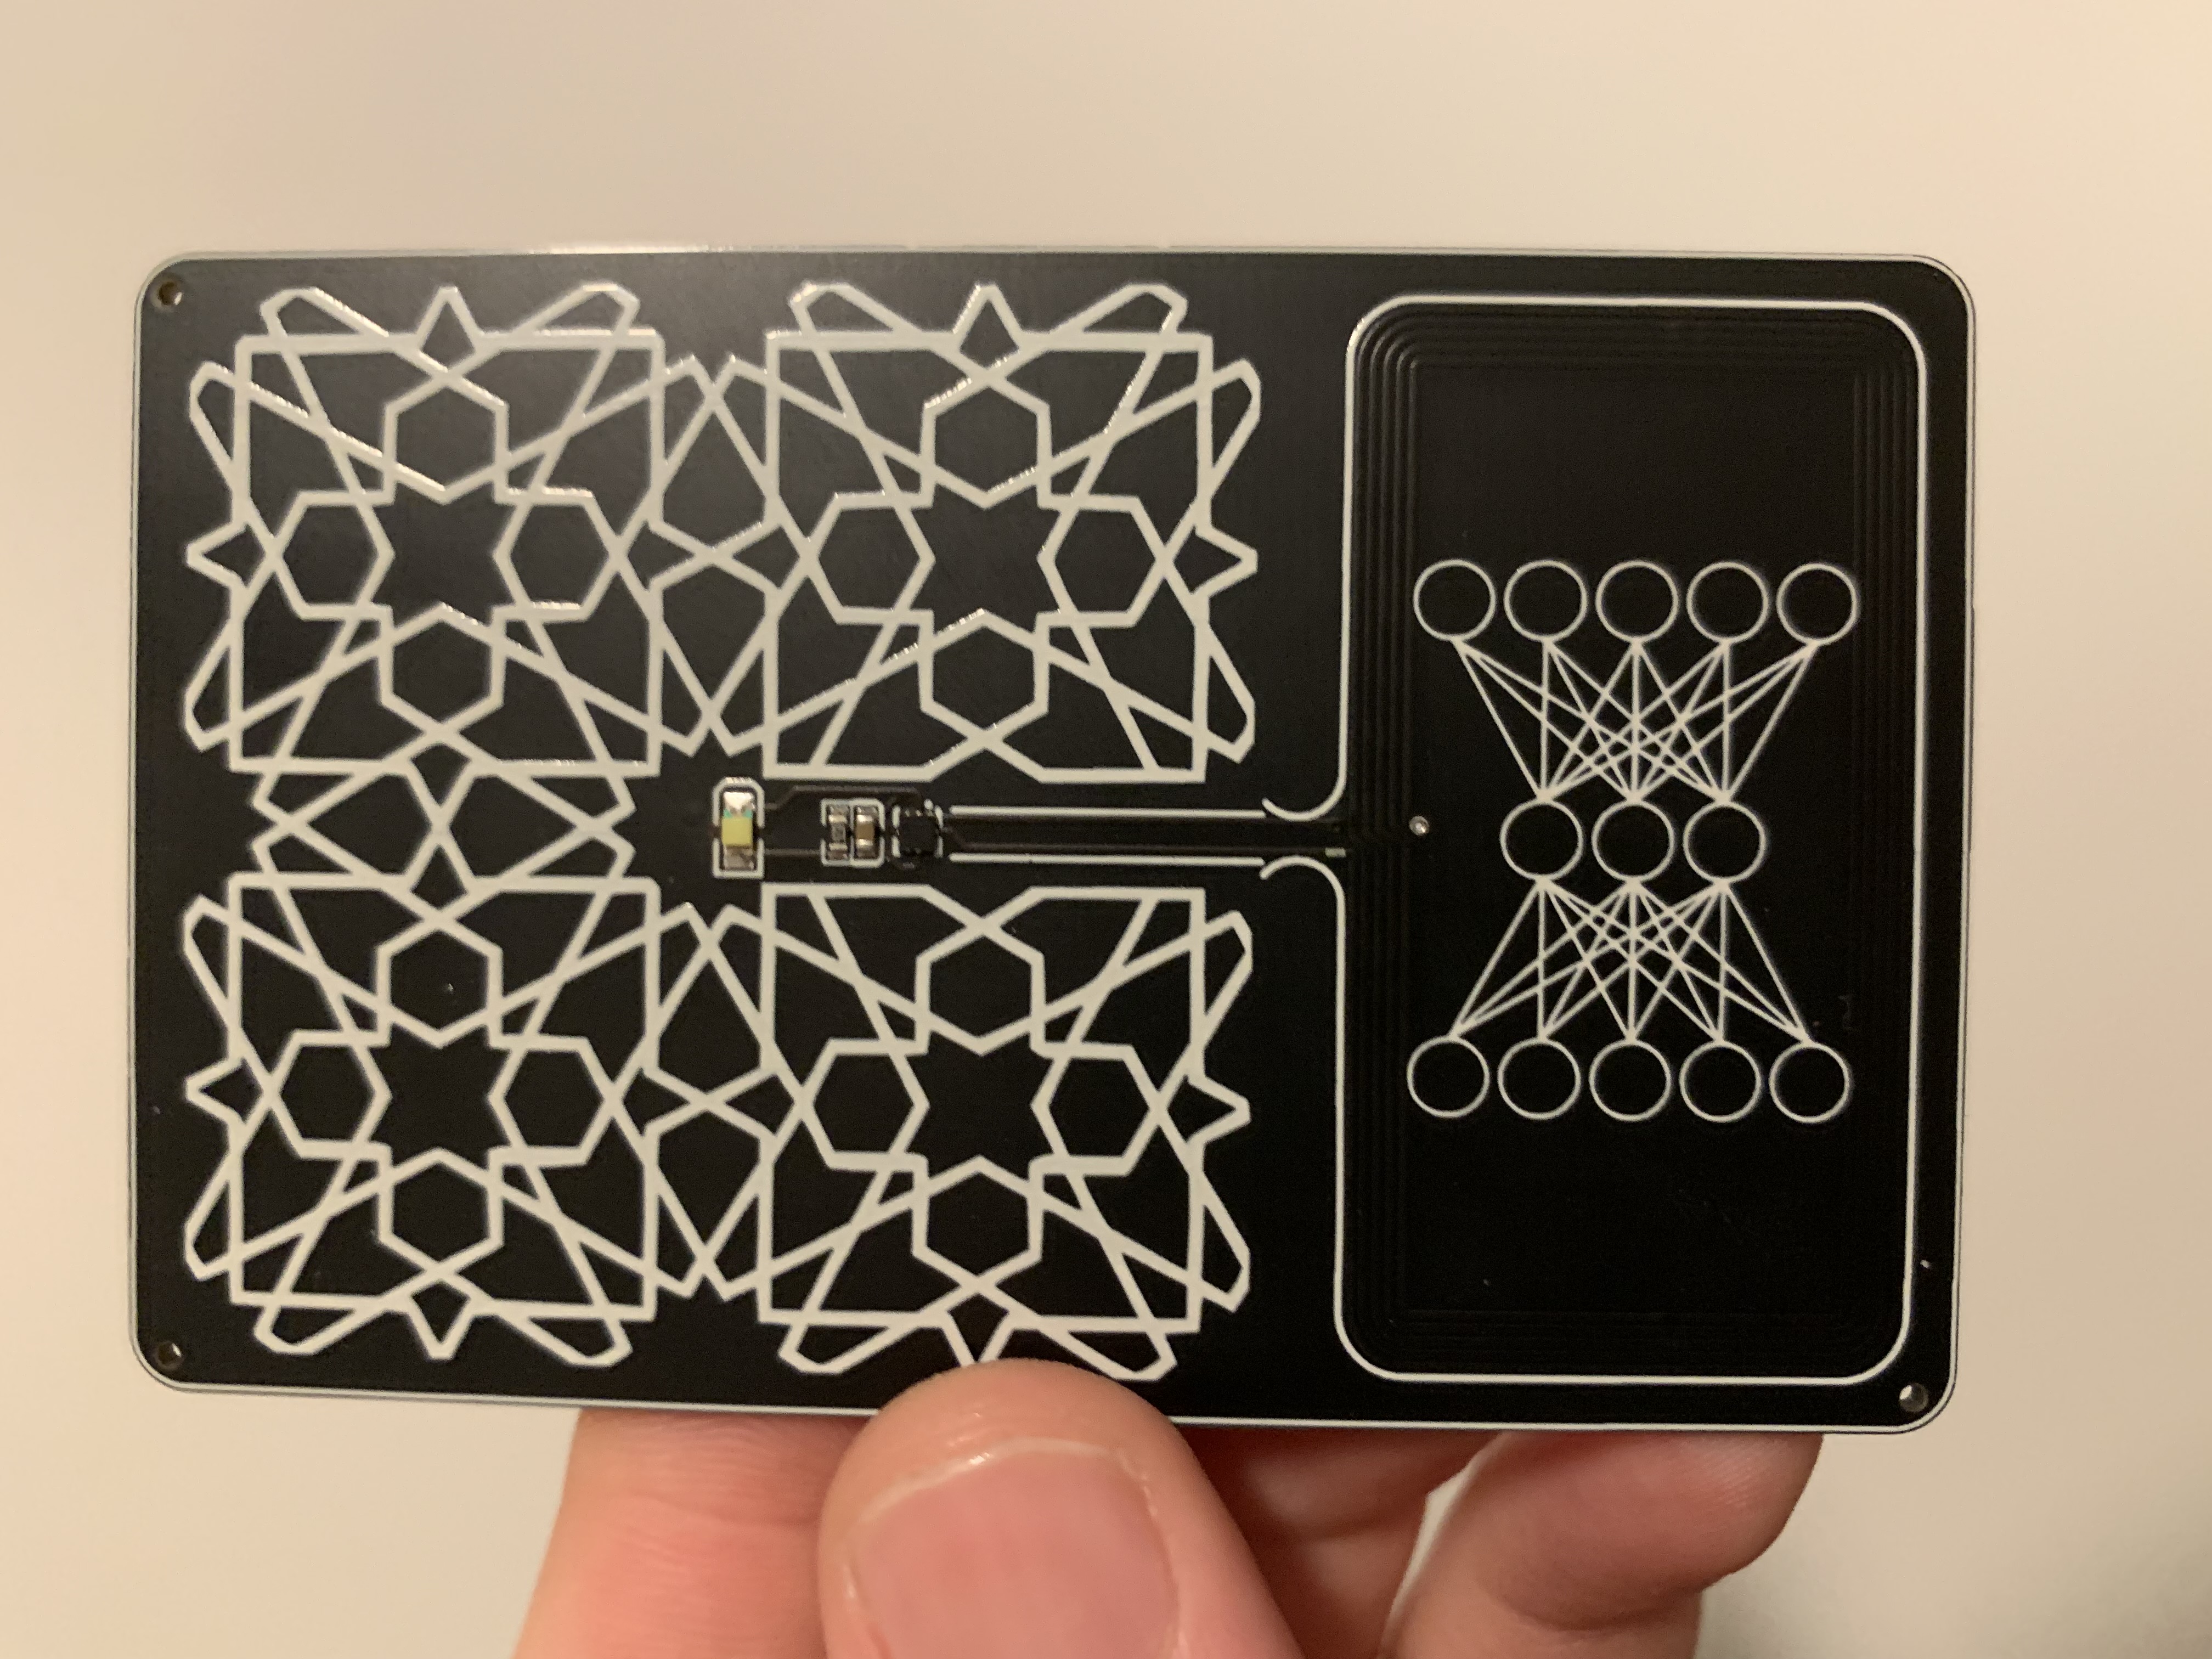
On the back, I added a cool geometric design I found around the circuit that's centered on the LED. Inside the antenna area, I added an auto encoder as a nod to my work in Machine Learning.
The most nerve-wracking part was testing if it actually works. That's the worst part of hardware compared to software. With code, if you screw up, you can just send out a patch and the problem is solved. With hardware, if there's a bug, then you've wasted all the money and materials of that batch. Luckily, it worked like a charm!